Essential Preventive Maintenance Tips for HVAC Systems

Maintaining the health and efficiency of your HVAC system is crucial for a comfortable and energy-efficient home. In this article, you will discover essential preventive maintenance tips that will help you keep your HVAC system running smoothly year-round. From regular filter changes to inspecting and cleaning components, these simple yet effective tips will ensure that your HVAC system operates at its best, saving you time, money, and discomfort. With Diamond Air Design’s expertise in HVAC repair in Pensacola FL and the surrounding area, you can rely on their professional service to provide you with the knowledge and support you need to keep your HVAC system in top shape. Visit their website at https://diamondairdesign.com/ to learn more.

Essential Preventive Maintenance Tips for HVAC Systems

This image is property of assets.searshomeservices.com.

Table of Contents

1. Change the Air Filters Regularly

– Importance of clean air filters

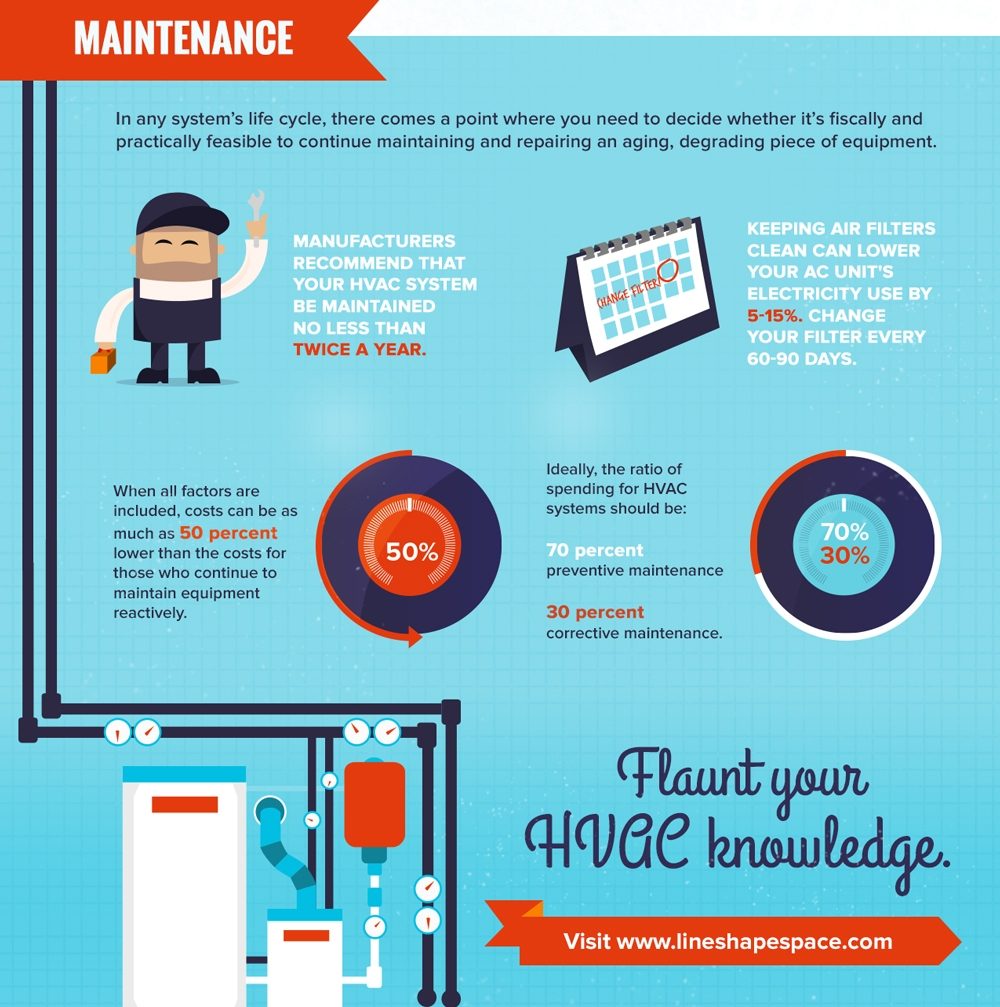
Clean air filters are essential for maintaining the efficiency and longevity of your HVAC system. The primary role of the air filters is to trap dust, dirt, and other particles from the air before it is circulated throughout your home. Over time, these filters can become clogged with debris, reducing the airflow and causing your system to work harder than necessary. By regularly changing the air filters, you can ensure that the air quality in your home remains at its best and that your HVAC system operates at peak performance.

– How often to change air filters

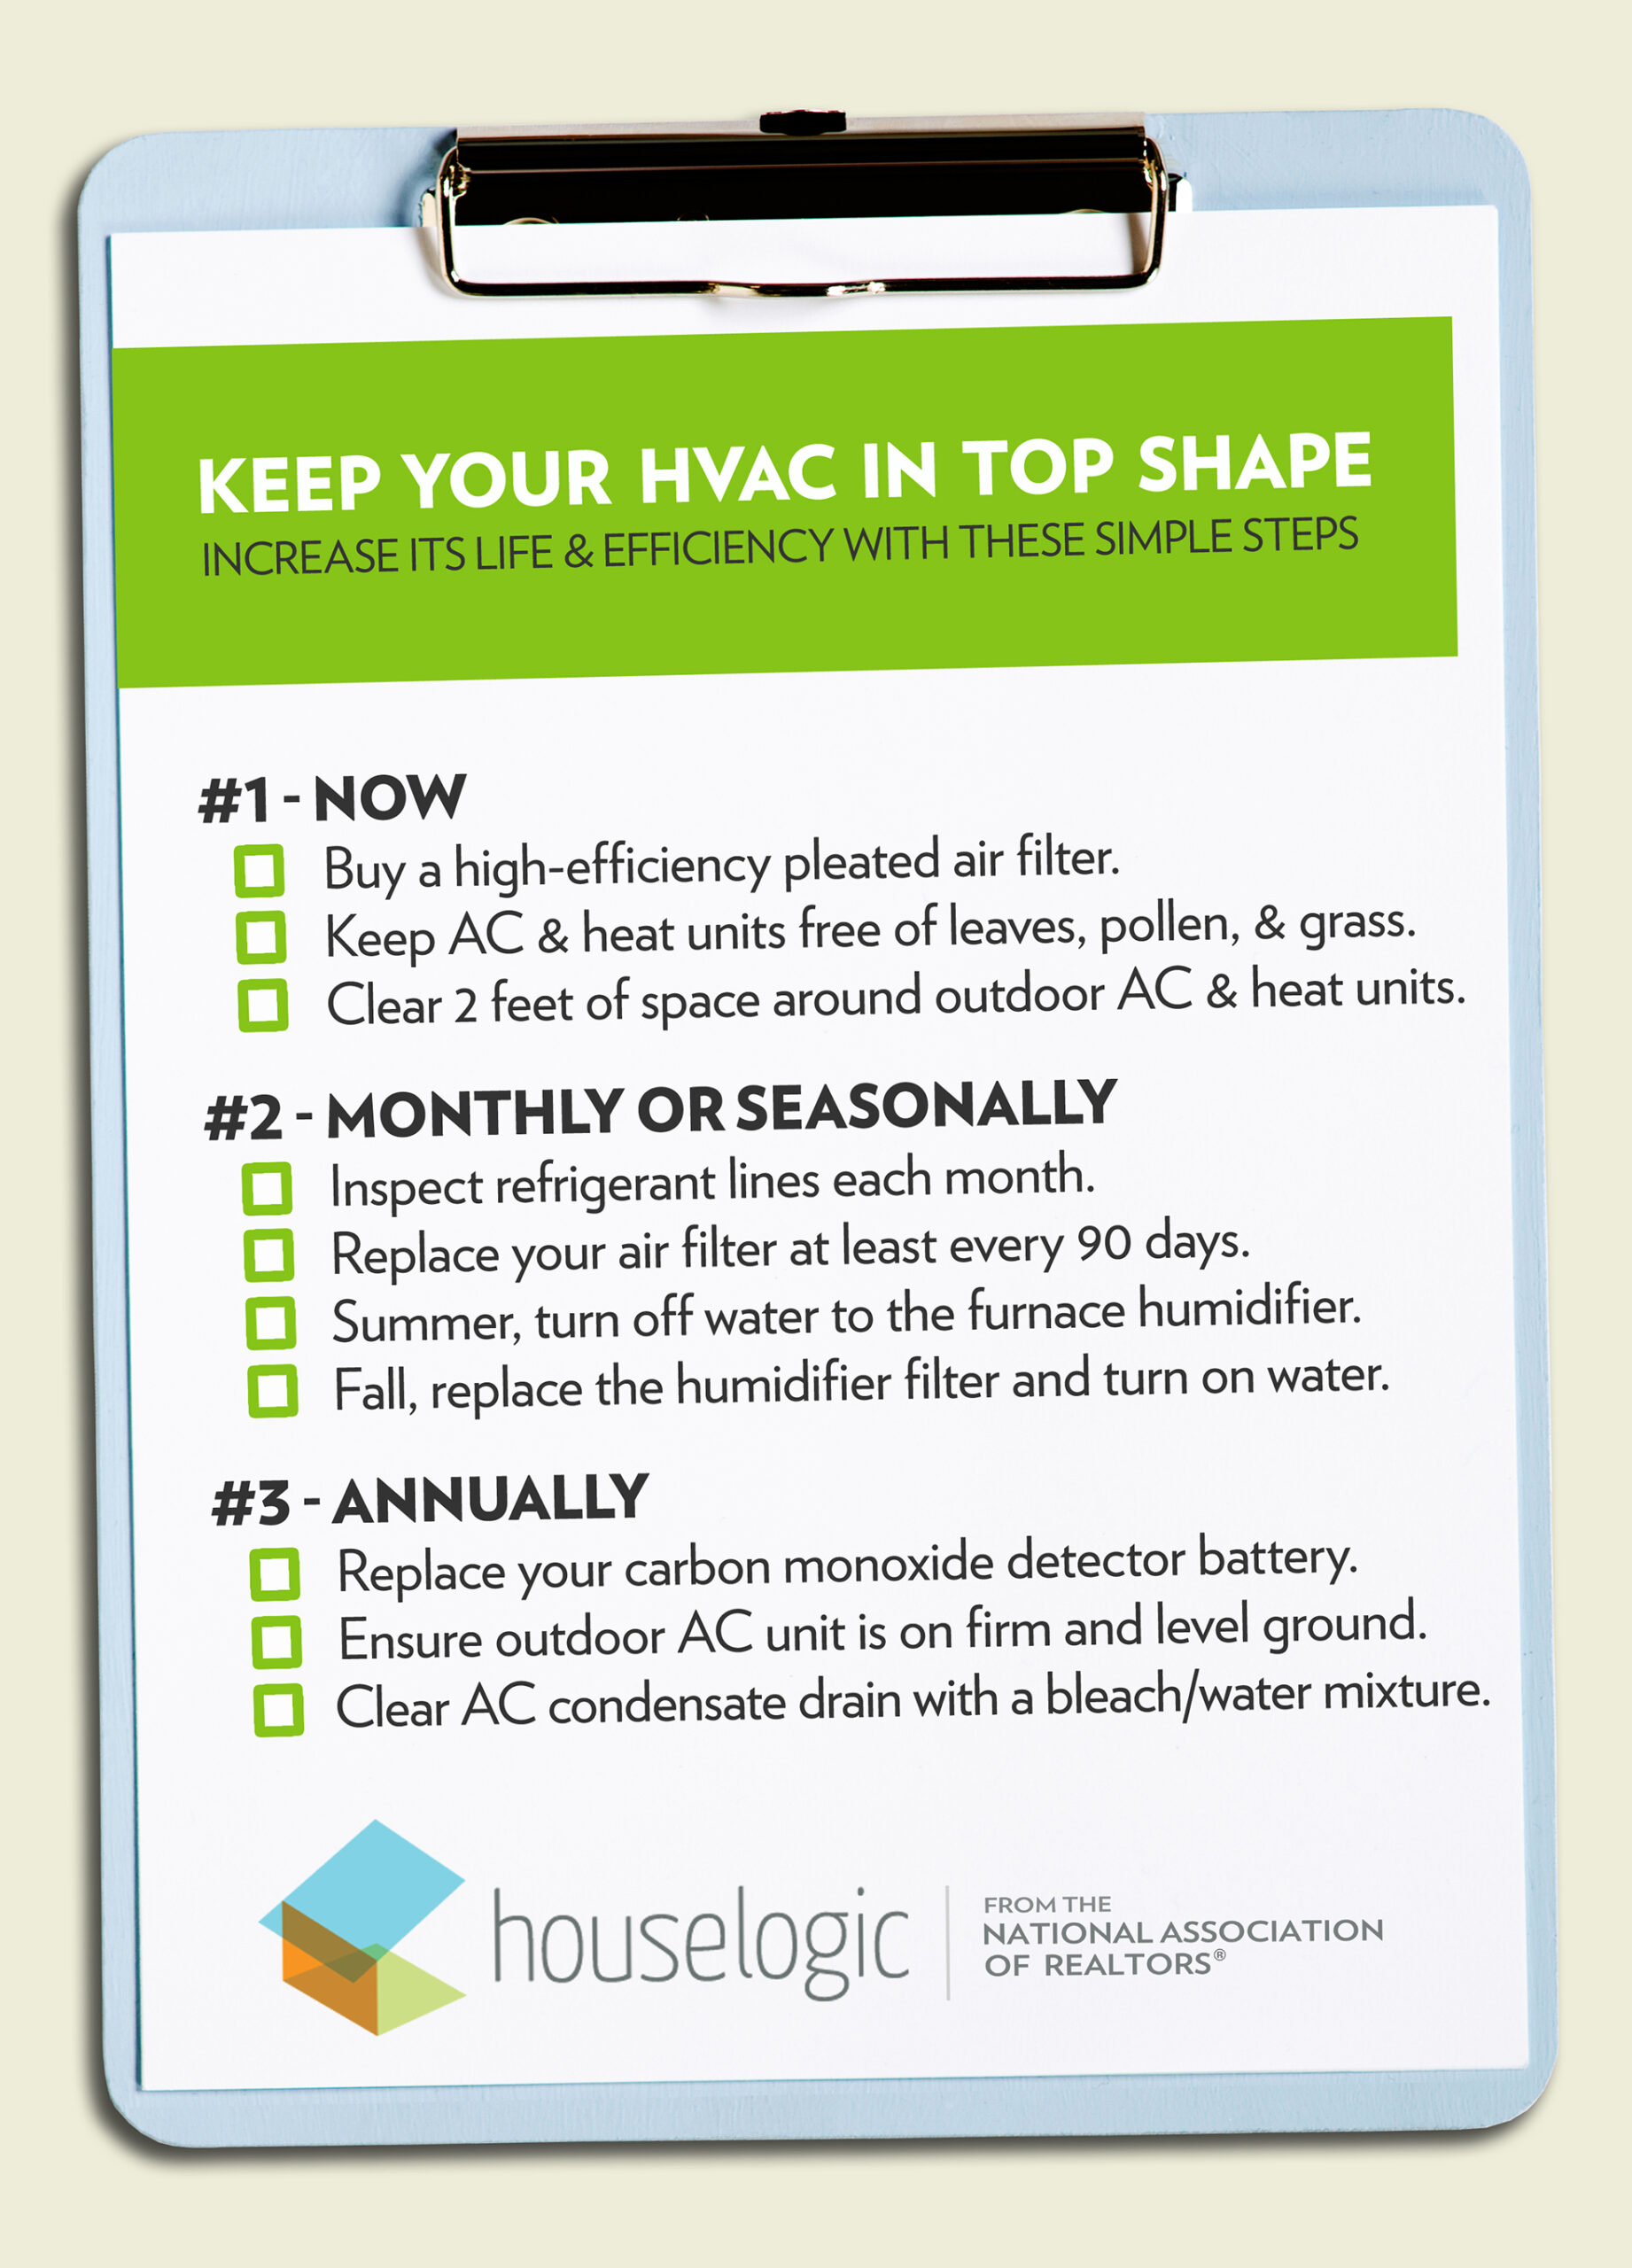
The frequency at which you should change your air filters depends on several factors, including the type of filter you have and the conditions in your home. As a general rule of thumb, it is recommended to change standard disposable filters every 1 to 3 months. However, if you have pets or allergies, you may need to change them more frequently, such as every 30 to 60 days. On the other hand, if you have a high-quality, pleated filter or an electrostatic filter, they can typically last up to 6 months before requiring replacement. It is important to check your filters regularly and replace them when they appear dirty or clogged.

– How to change air filters

Changing air filters is a simple task that can be done in just a few minutes. Here is a step-by-step guide to help you change your air filters:

  1. Turn off your HVAC system: Before starting the replacement process, it is important to turn off your HVAC system to avoid any potential hazards or damage.
  2. Locate the air filter: The air filter is typically located near the air intake area of your HVAC system, which is usually in the return air duct or the air handler unit.
  3. Remove the old filter: Carefully remove the old filter by sliding it out of its slot. Take note of the direction the filter was facing, as you will need to install the new filter in the same orientation.
  4. Install the new filter: Insert the new filter into the slot, making sure it fits snugly and securely. Ensure that the airflow direction arrows on the filter are pointing towards the ductwork or air handler.
  5. Turn on your HVAC system: Once the new filter is properly installed, you can turn on your HVAC system and resume normal operation.

Remember to dispose of the old filter properly and follow any manufacturer’s instructions that may be provided with the new filter. Regularly changing your air filters will help optimize the performance of your HVAC system and enhance the air quality in your home.

2. Clean the Condenser Coils

– Why condenser coils need to be cleaned

The condenser coils of your HVAC system play a crucial role in the cooling process. These coils are responsible for releasing the heat absorbed from your indoor air to the outdoor environment. Over time, the condenser coils can become dirty and covered in debris such as dirt, leaves, and grass clippings. This buildup restricts the heat transfer process and hampers the efficiency of your system. Cleaning the condenser coils regularly is essential to ensure optimal cooling performance and energy efficiency.

– How to clean condenser coils

Cleaning condenser coils is a relatively straightforward process that can be done using a few simple steps. Here’s a guide to help you clean your condenser coils effectively:

  1. Turn off the power: Before starting any maintenance on your HVAC system, always turn off the power to prevent any electrical accidents.
  2. Remove debris: Use a soft brush or a vacuum cleaner with a brush attachment to gently remove any loose debris from the exterior of the condenser unit. Be careful not to damage the delicate fins.
  3. Rinse the coils: Fill a spray bottle with a mixture of equal parts water and mild detergent. Spray the solution onto the condenser coils, focusing on the dirtiest areas. Allow the solution to sit for a few minutes to loosen the dirt.
  4. Clean the coils: Use a soft brush or a coil cleaning brush to gently scrub the coils, removing any stubborn dirt or grime. Start from the top and work your way down, being cautious not to bend the fins.
  5. Rinse thoroughly: Once you have cleaned the coils, use a hose or a bucket of clean water to rinse off the detergent and any remaining debris. Make sure to rinse from the top to ensure that all dirt and cleaning solution are washed away.
  6. Allow to dry: After rinsing, allow the condenser coils to air dry completely before turning the power back on.

– Recommended frequency for cleaning condenser coils

The frequency at which you should clean your condenser coils depends on several factors, including the environment in which your HVAC system operates. As a general guideline, it is recommended to clean the condenser coils at least once a year. However, if your system is located in an area with excessive dirt, dust, or vegetation, you may need to clean the coils more frequently, such as every 6 months or even quarterly. Regular cleaning of the condenser coils will improve the efficiency of your HVAC system and extend its lifespan.

3. Check and Clean the Evaporator Coils

– Importance of clean evaporator coils

The evaporator coils are responsible for absorbing heat from the air in your home, allowing your HVAC system to cool the indoor environment. Over time, these coils can accumulate dirt, dust, and even mold, which hampers their ability to absorb heat effectively. Clean evaporator coils are essential for maintaining optimal cooling performance and energy efficiency. Additionally, dirty evaporator coils can also lead to decreased indoor air quality and potential health issues.

– How to check and clean evaporator coils

Checking and cleaning the evaporator coils requires a bit more effort compared to changing air filters or cleaning condenser coils. Here’s a step-by-step guide to help you through the process:

  1. Turn off the power: As with any HVAC maintenance, start by turning off the power to the unit to ensure safety.
  2. Access the coils: The evaporator coils are typically located inside the air handler unit, which may require removing a panel or cover to access. Refer to the manufacturer’s instructions or seek professional help if needed.
  3. Inspect the coils: Once you have access to the evaporator coils, visually inspect them for any signs of dirt, dust, or mold. Use a flashlight if necessary to get a clear view.
  4. Clean the coils: If you notice significant dirt or mold on the coils, it is best to clean them to restore efficiency. Use a soft brush or a coil cleaning brush to gently remove the dirt or mold buildup. Take care not to damage the delicate fins in the process.
  5. Use a coil cleaner: For stubborn dirt or mold, you may need to use a coil cleaner specifically designed for evaporator coils. Follow the manufacturer’s instructions and apply the cleaner as directed. Be sure to use a cleaner that is safe for your specific HVAC system and evaporator coils.
  6. Rinse and dry: After cleaning, rinse the coils thoroughly with water. Use a spray bottle or a hose to remove any remaining dirt or cleaning solution. Allow the coils to dry completely before reassembling the unit and turning the power back on.

– Recommended frequency for checking and cleaning evaporator coils

The frequency of checking and cleaning the evaporator coils can vary depending on several factors, such as the local climate, the presence of pets or smokers in the home, and the air quality in your area. As a general guideline, it is recommended to check and clean the evaporator coils at least once a year. However, if you notice any decrease in cooling efficiency, poor air quality, or signs of mold growth, it may be necessary to check and clean the coils more frequently, such as every 6 months. Regular maintenance of the evaporator coils will contribute to the overall performance and longevity of your HVAC system.

4. Inspect and Clean the Blower Motor and Fan

– Importance of regular inspection and cleaning

The blower motor and fan are integral components of your HVAC system, responsible for circulating air throughout your home. Over time, these components can accumulate dust and debris, which can negatively impact their performance and efficiency. Regular inspection and cleaning of the blower motor and fan are crucial to ensure proper airflow, enhance indoor air quality, and prevent unnecessary strain on your system.

– How to inspect and clean the blower motor and fan

Inspecting and cleaning the blower motor and fan require careful attention and should be done with caution. Follow these steps to keep these components in optimal condition:

  1. Turn off the power: Always turn off the power to your HVAC system before performing any maintenance tasks to avoid injury or damage.
  2. Access the blower motor and fan: Depending on your system, you may need to remove a panel or cover to access the blower motor and fan. Refer to the manufacturer’s instructions or seek professional assistance if necessary.
  3. Visual inspection: Use a flashlight to visually inspect the blower motor and fan for any visible dirt, dust, or debris. Take note of the condition and look for signs of wear or damage.
  4. Clean the blower motor: Use a soft brush or a vacuum cleaner with a brush attachment to carefully remove any loose dirt or debris from the blower motor. Be mindful of the delicate electrical components and wires. If necessary, you can use compressed air to blow away stubborn dust, but do so cautiously to avoid damaging the motor.
  5. Clean the fan blades: Gently clean the fan blades using a soft brush or a cloth dampened with a mild detergent solution. Be careful not to bend or damage the blades. If the blades are excessively dirty, you may need to remove them for a more thorough cleaning. Follow the manufacturer’s instructions for removing and reattaching the blades.
  6. Reassemble and test: Once the blower motor and fan are clean, carefully reassemble the unit and ensure that all connections are secure. Turn on the power and test the system to verify that the blower motor and fan are operating smoothly and quietly.

– Recommended frequency for inspection and cleaning

The frequency of inspecting and cleaning the blower motor and fan depends on several factors, including the environment in which your HVAC system operates. As a general guideline, it is recommended to inspect and clean the blower motor and fan at least once a year. However, if you live in an area with high dust, pet hair, or pollen, you may need to perform this maintenance task more frequently, such as every 6 months. Regularly inspecting and cleaning the blower motor and fan will contribute to the overall performance and efficiency of your HVAC system.
Essential Preventive Maintenance Tips for HVAC Systems

This image is property of www.legacyheating.ca.

5. Lubricate Moving Parts

– Why lubricating moving parts is important

The smooth operation of the moving parts in your HVAC system is crucial for its overall performance and lifespan. Over time, these parts can experience friction and wear, leading to increased energy consumption and potential damage. Lubricating the moving parts regularly reduces friction, minimizes wear and tear, and helps maintain the efficiency of your system.

– Which parts need lubrication

Several components of your HVAC system may require lubrication, including blower motor bearings, fan motors, pulleys, and other moving parts. It is important to check the manufacturer’s instructions or consult with a professional to determine which specific parts in your system require lubrication.

– How often to lubricate moving parts

The frequency at which you should lubricate the moving parts of your HVAC system depends on the specific components and the manufacturer’s recommendations. As a general guideline, it is recommended to lubricate the relevant parts at least once a year. However, some components may require more frequent lubrication, while others may not need it as often. Regularly inspecting and lubricating the moving parts of your HVAC system will help reduce friction, extend the lifespan of the components, and enhance the overall performance of your system.

6. Check and Repair Ductwork

– Importance of checking ductwork

The integrity of your HVAC system’s ductwork is crucial for efficient and effective heating and cooling. Over time, ductwork can develop leaks, cracks, or other damages that allow conditioned air to escape before reaching its intended destination. Checking the ductwork for any issues and promptly repairing them is important to ensure optimal airflow, temperature control, and energy efficiency.

– How to check for leaks and damages

Checking for leaks and damages in the ductwork requires a systematic approach. Follow these steps to assess the condition of your ductwork:

  1. Visual inspection: Start by visually inspecting the visible sections of the ductwork, such as those in the basement, attic, or crawlspaces. Look for any visible signs of leaks, such as loose connections, disconnected joints, or visible holes or gaps.
  2. Feel for air leaks: Carefully run your hand along the ductwork while the HVAC system is running. Feel for any air leaks, which are often characterized by drafts, temperature differences, or whistling sounds.
  3. Utilize smoke or fog testers: If you suspect there are hidden leaks or damages in the ductwork, you can use smoke or fog testers to identify any air movement. During this test, you will introduce smoke or fog into the ducts and observe for any movement or escaping air.
  4. Professional inspection: If you are unable to identify or resolve any issues with the ductwork, it may be necessary to schedule a professional inspection. HVAC professionals have the tools and expertise to perform a comprehensive assessment of your ductwork and recommend any necessary repairs.

– Importance of repairing ductwork

Repairing any leaks or damages in the ductwork is crucial for several reasons. When conditioned air escapes through leaks or gaps in the ducts, your HVAC system must work harder to compensate, resulting in decreased energy efficiency and increased utility bills. Additionally, leaking ducts can allow contaminants such as dust, mold, and other pollutants to enter the air you breathe, potentially causing health issues. Promptly repairing any issues with the ductwork will ensure that your HVAC system operates at its best, providing efficient, clean, and comfortable air throughout your home.
Essential Preventive Maintenance Tips for HVAC Systems

This image is property of static.houselogic.com.

7. Test and Calibrate Thermostat

– Importance of thermostat calibration

The thermostat serves as the control center for your HVAC system, determining when to turn on/off heating or cooling and maintaining the desired temperature in your home. Over time, thermostats can lose accuracy, leading to improper temperature control and reduced energy efficiency. Testing and calibrating your thermostat regularly is crucial to ensure accurate temperature readings and efficient operation of your HVAC system.

– How to test and calibrate thermostat

Testing and calibrating your thermostat can be done with a few simple steps:

  1. Test for accuracy: Use a separate thermometer to compare the temperature reading of your thermostat. Place the thermometer next to the thermostat and allow them to sit together for a few minutes. Compare the readings to determine if your thermostat is accurately displaying the room temperature. If there is a significant discrepancy, calibration may be necessary.
  2. Calibrate the thermostat: Consult the manufacturer’s instructions or user manual for specific calibration instructions, as the process may vary depending on the thermostat model. In most cases, you will need to remove the thermostat from the wall, loosen the calibration screw, and adjust the temperature reading to match the separate thermometer’s reading. Once adjusted, tighten the calibration screw and reattach the thermostat to the wall.
  3. Test after calibration: After calibrating the thermostat, retest it using the separate thermometer to ensure that the temperature readings are now accurate. If needed, repeat the calibration process until the readings align.

– Recommended frequency for testing and calibration

The frequency at which you should test and calibrate your thermostat depends on the type of thermostat and its age. As a general guideline, it is recommended to test the accuracy of your thermostat at least once a year. If you notice any significant discrepancies or irregularities in temperature control, it may be necessary to calibrate the thermostat more frequently. Regularly testing and calibrating your thermostat will help maintain efficient temperature control and prevent unnecessary energy consumption.

8. Inspect Electrical Connections

– Why inspecting electrical connections is important

Proper electrical connections are crucial for the safe and reliable operation of your HVAC system. Over time, electrical connections can become loose, corroded, or damaged, which can lead to malfunctions, overheating, or even electrical fires. Regularly inspecting the electrical connections ensures that they are secure, minimizing the risk of electrical hazards and ensuring the optimal performance of your HVAC system.

– How to inspect electrical connections

Inspecting the electrical connections of your HVAC system requires caution and attention to detail. Follow these steps to conduct a thorough inspection:

  1. Turn off the power: Before inspecting any electrical components, ensure that the power to the HVAC system is turned off to prevent electrical accidents.
  2. Visual inspection: Carefully inspect all visible electrical connections, such as those near the main unit, control panel, or electrical junction boxes. Look for any signs of loose or disconnected wires, corrosion, or other visible damages. Ensure that all connections are tight and properly secured.
  3. Tighten loose connections: If you notice any loose connections, use a screwdriver or an appropriate tool to tighten them securely. However, exercise caution and avoid overtightening, as this can strip the connection or cause damage.
  4. Check for corrosion: Corrosion is a common issue with electrical connections, especially in humid environments. If you notice any signs of corrosion, use a wire brush or electrical contact cleaner to clean the affected surfaces. Ensure that the connections are completely dry before turning the power back on.
  5. Seek professional assistance if needed: If you are uncertain or uncomfortable performing an electrical inspection, it is recommended to seek the expertise of a qualified HVAC technician who can conduct a comprehensive inspection and resolve any issues safely.

– Recommended frequency for inspection

The frequency at which you should inspect the electrical connections of your HVAC system depends on several factors, including the age of the system and the environment in which it operates. As a general guideline, it is recommended to inspect the electrical connections once a year. However, if you notice any signs of loose wires, corrosion, or other electrical issues, it is advisable to conduct an inspection promptly. Regularly inspecting the electrical connections will help ensure the safety and reliability of your HVAC system.
Essential Preventive Maintenance Tips for HVAC Systems

This image is property of i4tglobal.com.

9. Clean and Inspect Condensate Drain

– Importance of clean condensate drain

The condensate drain is responsible for removing the excess moisture that is generated during the cooling process of your HVAC system. Over time, the condensate drain can become clogged with algae, mold, dust, or other debris, leading to water backup, leaks, and potential damage to your system. Keeping the condensate drain clean and free from obstructions is vital for preventing water damage and maintaining the optimal performance of your HVAC system.

– How to clean and inspect condensate drain

Cleaning and inspecting the condensate drain require some basic tools and a systematic approach. Here’s a step-by-step guide to help you through the process:

  1. Turn off the power: Always turn off the power to your HVAC system before performing any maintenance tasks to avoid potential electrical hazards.
  2. Locate the condensate drain: The condensate drain is typically located near the evaporator coil or air handler unit. It is a PVC pipe that extends from the indoor unit to the outside of your home.
  3. Remove any debris: Inspect the condensate drain and remove any visible debris, such as leaves, insects, or dirt, from the opening. You can use a small brush or a pipe cleaner to gently remove the obstructions.
  4. Clean the drain line: Mix equal parts water and vinegar in a bucket or container. Pour the solution into the condensate drain line to help dissolve any accumulated algae or mold. Allow the solution to sit for a few minutes.
  5. Flush with clean water: After the cleaning solution has had time to work, flush the condensate drain line with clean water to remove any remaining debris or residue. You can use a funnel or a hose to pour water into the drain opening.
  6. Test the drain line: Once you have finished cleaning, pour a cup of water into the drain line to verify that it is draining properly. If the water flows smoothly and exits outside, the drain line is clear. If the water backs up or does not flow freely, there may still be an obstruction that requires further attention.
  7. Regularly inspect and maintain: During routine HVAC maintenance, be sure to inspect the condensate drain for any signs of buildup or blockage. Cleaning the drain line as needed will help prevent water damage and maintain the efficiency of your HVAC system.

– Recommended frequency for cleaning and inspection

The frequency at which you should clean and inspect the condensate drain depends on several factors, such as the local climate, indoor humidity levels, and the presence of any known drainage issues. As a general guideline, it is recommended to clean and inspect the condensate drain at least once a year. However, if you live in a humid climate or notice any water backups, leaks, or musty odors, it may be necessary to clean and inspect the drain more frequently, such as every 6 months. Regular maintenance of the condensate drain will help prevent water damage and ensure the efficient operation of your HVAC system.

10. Schedule Professional HVAC Maintenance

– Importance of professional maintenance

While regular DIY maintenance tasks are vital for keeping your HVAC system in good condition, scheduling professional HVAC maintenance is equally important. Professional technicians have the expertise, experience, and specialized tools necessary to perform a thorough inspection and maintenance of your system. They can identify potential issues, address them promptly, and optimize the performance and lifespan of your HVAC system.

– What to expect from professional maintenance

During a professional HVAC maintenance visit, you can expect the following tasks to be performed:

  1. Comprehensive system inspection: A professional technician will inspect all components of your HVAC system, including the condenser unit, evaporator coils, blower motor, electrical connections, and ductwork. They will check for any signs of wear, damage, leaks, or inefficiencies.
  2. Cleaning and lubrication: The technician will clean the condenser coils, evaporator coils, blower motor, fan blades, and other components as needed. They will also lubricate the appropriate moving parts to reduce friction and ensure smooth operation.
  3. Testing and calibration: The technician will test and calibrate the thermostat to ensure accurate temperature control. They may also check and adjust the refrigerant levels, as well as perform system performance tests to ensure optimal operation.
  4. Ductwork assessment: The technician will inspect the ductwork for any leaks, damages, or obstructions. They may recommend repairs or sealing if necessary.
  5. System optimization: After completing the necessary inspections, cleaning, and adjustments, the technician will provide recommendations for optimizing the performance and energy efficiency of your HVAC system. They may suggest upgrades, filter changes, or insulation improvements based on their findings.
  6. Professional advice: A professional HVAC maintenance visit is an opportunity to ask questions and seek advice on maintaining and optimizing your system. The technician can provide insights specific to your HVAC system and offer guidance on energy-saving practices and system usage.

– Recommended frequency for professional maintenance

It is generally recommended to schedule professional HVAC maintenance at least once a year. Ideally, it is best to schedule maintenance in the spring or fall before the peak cooling or heating seasons. Regular professional maintenance will ensure that your HVAC system is operating efficiently, maximize its lifespan, and provide you with peace of mind knowing that your system is in good hands.

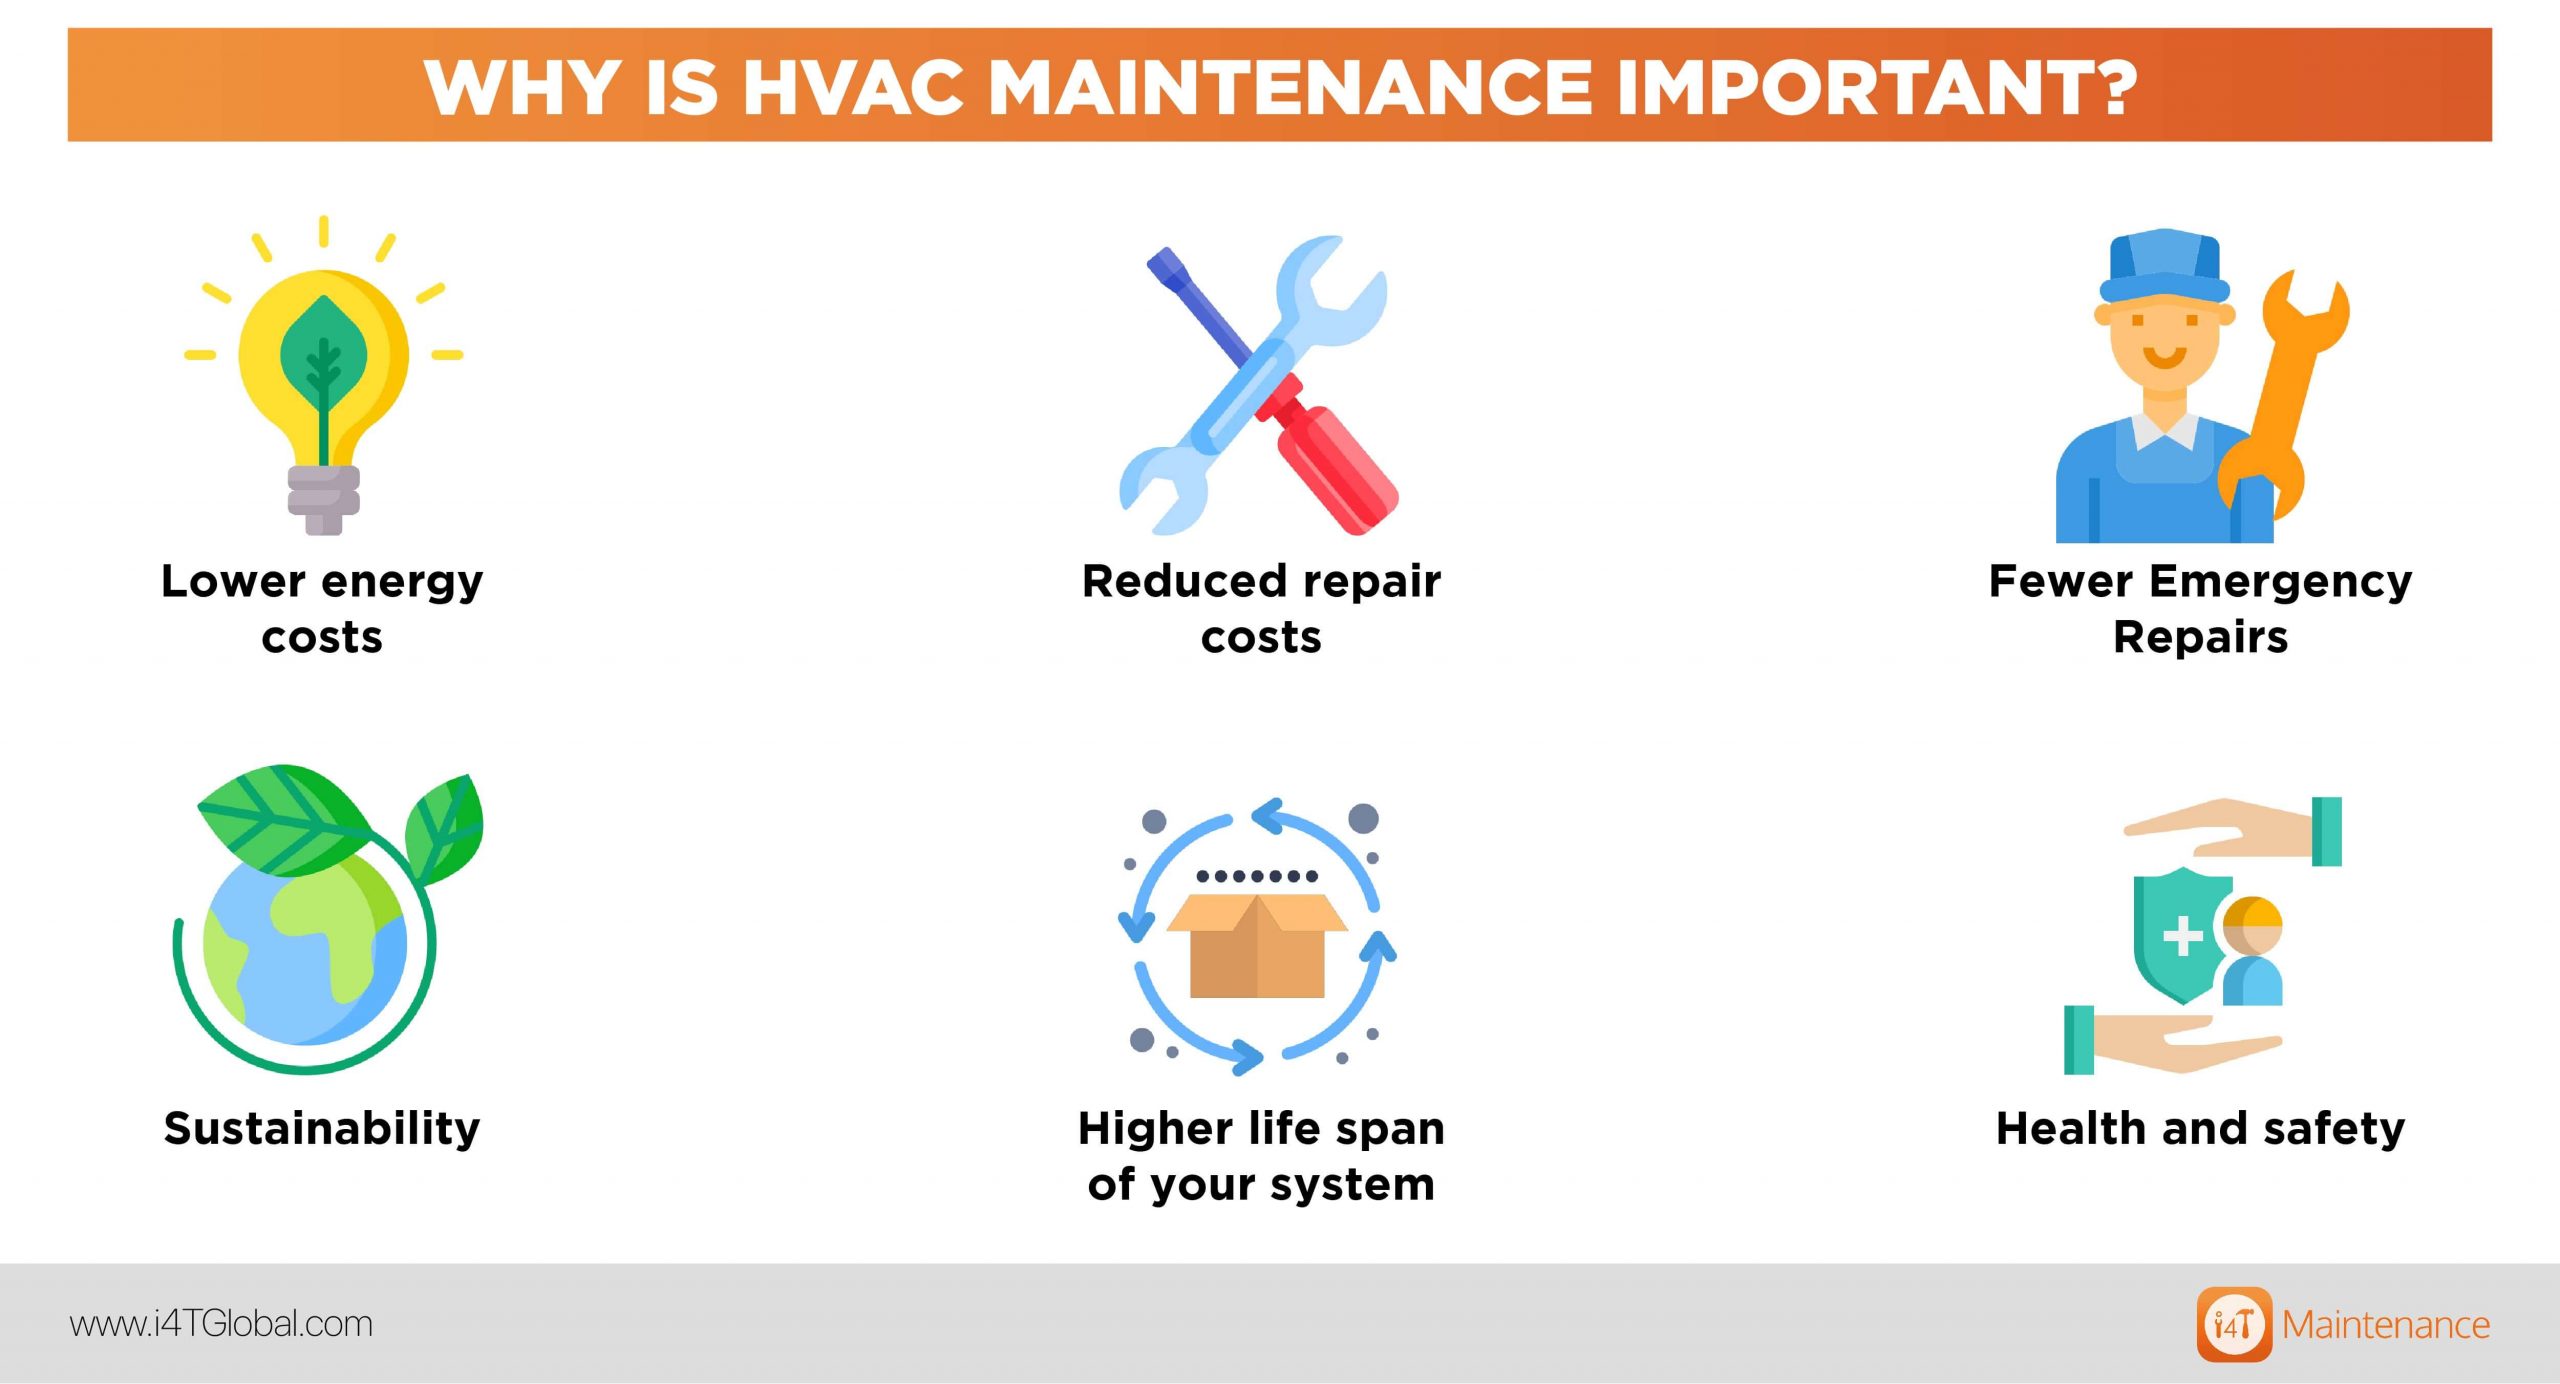
In conclusion, taking preventive maintenance measures for your HVAC system is essential for maximizing its efficiency, performance, and lifespan. By regularly changing air filters, cleaning condenser coils and evaporator coils, inspecting and cleaning the blower motor and fan, lubricating moving parts, checking and repairing ductwork, testing and calibrating the thermostat, inspecting electrical connections, cleaning and inspecting the condensate drain, and scheduling professional HVAC maintenance, you can keep your HVAC system in optimal condition. Remember that regular maintenance not only enhances the comfort and air quality in your home but also helps save energy and reduce the likelihood of costly repairs. So, don’t forget to prioritize the preventive maintenance of your HVAC system to ensure long-term comfort and efficiency.

Essential Preventive Maintenance Tips for HVAC Systems

This image is property of images.squarespace-cdn.com.

Let’s Get Started. Ready to speak with an expert?

Richard Orlando
Richard Orlando
December 29, 2022
Professional all the way! Hunter is the man and I would recommend this company to anyone.
S Reyes
S Reyes
December 15, 2022
Great family owned business. They show up when they say they will and do great work!
Michael C
Michael C
September 30, 2022
I engaged Diamond Air Design to replace two heat pump systems at my residence. From my initial contact to the completion of the project, I received nothing but the highest level of professional service. Brandon and his installation team did meticulous work, completing the project on time and exactly as promised. Diamond Air is a family-owned business with a sterling reputation. From my experience I understand exactly how they attained and why they deserve that reputation. Highly recommended.
Dennis Wilson
Dennis Wilson
September 19, 2022
Excellent installation of thermostat and HVAC unit and ‘fine-tuning’ the unit. Technician very courteous and informative.
Myda Young
Myda Young
September 7, 2022
This is one of the 3 companies I had out to my house. I’m very happy Diamond Air was one I contacted. They offered exactly what I needed, did not upsell me and were right on target on what would solve my issue. Preston, my Service Tech, was ready to answer my questions, was super knowledgeable, professional and just a charm beaming with honesty, kindness and all I could pray for in a service tech. You will not be disappointed putting your A/C equipment in their hands! Thank you Diamond Air Team! You have my business.
DarinJon Christopher
September 6, 2022
Just another Professional service from Diamond Air Design. We started using this company when Brandon was just starting his business and learning from his dad. His Mom was in the office and we loved it was family assisting other families whom needed help. Preston the young gentleman who came today was very professional and a service tech who explained everything as I like to know what's going on with my equipment.Thank you Sir and I hope you continue to make your career with Brandon's team as you continue to learn. Thanks again Diamond
Ronald Specker
Ronald Specker
August 11, 2022
I had an American Standard Platinum HVAC System installed. Brandon, Stewart, and Preston did the install work. They were scheduled to start at 8:00 am. Stewart arrived at 7:45 am and immediately went to work. Brandon and Preston arrived at 8:00 am with the new HVAC System. I tried to offer them drinks and something to eat but they were more concerned with completing the job. The crew was absolutely fantastic. They completed the install work in about 7 hours. They never stopped working until the job was completely finished. They did an outstanding job installing the new system. The company even filed my warranty paper work for me. I had to do nothing but sit back at let them do all the work, from the install, warranty registration, and setting up the county inspection. They even provided financing for 0% interest rate for 60 months. I would ABSOLUTELY recommend Daimond Air Design for HVAC System Replacement!!!

NEED FINANCING? YOU HAVE SEVERAL OPTIONS!

Related Articles

Coolants And HVAC: A Comprehensive Guide

Do you ever wonder about the secret behind your cozy home during harsh winters or hot summers? The answer is hidden in your HVAC system. In this thorough guide titled, "Coolants and HVAC: A Comprehensive Guide," you'll gain in-depth insight into the pivotal role that...

Emerging Trends In The HVAC World

Brace yourself as we embark on an intriguing journey through the swiftly changing landscape of the HVAC world in the article "Emerging Trends In The HVAC World". You'll uncover fascinating insights into modern trends that are poised to transform the HVAC industry....

Sizing Up: How To Pick The Right HVAC Unit

You're about to embark on a journey of optimization and efficiency, as this handy guide will teach you how to choose the perfect HVAC unit for your specific needs. With a focus on the crucial element of sizing, you'll gain insights that will save you precious time,...

Why You Can’t Skip Your Annual HVAC Service

You're probably thinking, "Do I really need to service my HVAC system every year?" This is a question many homeowners ask when their HVAC system seems to be working perfectly fine. Yet, making a decision to skip your HVAC's yearly service can have adverse...

Secrets To Optimal HVAC Airflow

Secrets To Optimal HVAC Airflow

Are you ready to unlock the secrets of achieving optimal HVAC airflow? You're about to journey through the intriguing world of heating, ventilation, and air conditioning, where a seamless flow of air can mean difference between comfort and frustration. This article...

Budgeting For Your Next HVAC: A Practical Guide

Budgeting For Your Next HVAC: A Practical Guide

Gearing up for an HVAC purchase can be a challenging task, especially when you're concerned about budgeting. Your concerns are valid due to the vital role HVAC systems play in maintaining comfort in homes. In the "Budgeting For Your Next HVAC: A Practical Guide,"...

Investing In Green: Energy-Efficient HVAC Upgrades

Investing In Green: Energy-Efficient HVAC Upgrades

You've done your research, you've read the articles, and you've made the big decision: it's finally time to make that move towards more eco-friendly practices, starting with your home. You've chosen to begin with the heart of your home's heating, ventilating and air...

Silencing A Noisy HVAC: Causes & Solutions

Silencing A Noisy HVAC: Causes & Solutions

It's brilliant that you want to create a peaceful environment in your home. So let's tackle one real enemy of tranquillity: a noisy HVAC system. "Silencing A Noisy HVAC: Causes & Solutions" is a concise guide just for you. It's liberally laced with practical tips and...

The Heartbeat Of HVAC: Mastering Thermostat Settings

The Heartbeat Of HVAC: Mastering Thermostat Settings

As a savvy homeowner, you hold the power to save energy and make your home more comfortable with a simple touch—mastering your thermostat settings is the heartbeat of your HVAC system. This article is your guide to understanding the intricate relationship between your...

Routine Check: Your Go-To HVAC Maintenance List

Routine Check: Your Go-To HVAC Maintenance List

Safeguarding the efficiency of your heating, ventilation, and air conditioning (HVAC) system requires regular maintenance checks. This handy guide, "Routine Check: Your Go-To HVAC Maintenance List" will offer you essential insights on keeping your HVAC in optimal...